Kedarkantha Trek Guide 2026: The Ultimate "Winter Summit" for Beginners
📍The Mighty Himalayas (North India)
The Summit Summary
- Location: Uttarakhand (Uttarkashi District, Govind Pashu Vihar National Park).
- The Vibe: Pure "Summit Fever." Unlike valley treks where you walk through mountains, here you climb on top of one. It offers a true expedition feel with a 360-degree peak view.
- Difficulty: Easy to Moderate. It is the perfect training ground for first-timers wanting to experience snow and altitude.
- Duration & Variants: 4-6 Days (Standard Itinerary). 20 km Total Distance. Options: "Winter Snow Trek" (Dec-Feb) or "Spring Greenery" (March-April).
- TrippinAI Recommended Slot: Start the summit push at 2:00 AM from Base Camp. You need to reach the top by sunrise to see the "Alpenglow" on the Swargarohini peaks.
- The TrippinAI Rating: "At TrippinAI, we rate this trek a 4/10 on endurance (short daily distances of 4-5 km, but the final summit climb is steep)."
The Climb: What to Expect
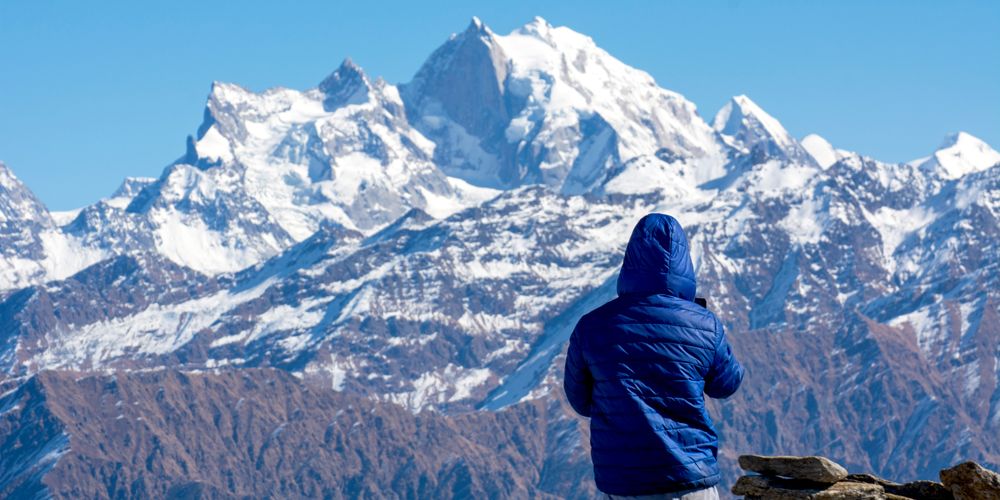
The Reality Check: The ascent of Kedarkantha is a dramatic three-act play. Act One is a walk through silent, towering pine forests where the sunlight filters through in golden shafts. Act Two is the frozen wonder of Juda Ka Talab, a lake that turns into a solid sheet of ice in winter, surrounded by white slopes perfect for sliding. Act Three is the summit push—a pre-dawn struggle against biting cold winds and knee-deep snow. But as you scramble up the final rocky ridge and touch the trident (Trishul) at the top, the world opens up. You are standing at 12,500 ft, surrounded by a 360-degree amphitheater of the mighty Gangotri and Yamunotri ranges. It is an adrenaline rush that few beginner treks can match.
Why It's Famous & What Trekkers Say
The Fame Check:
- The "Winter" King: Kedarkantha is undisputed as India's most popular winter trek. It receives heavy snowfall (often 3-5 feet) but remains accessible when higher passes are closed.
- The "Frozen Lake" Viral Trend: Videos of trekkers walking (or sliding) on the frozen surface of Juda Ka Talab flood social media every January.
The Social Pulse:
- The Good (What Trekkers Love): The reward-to-effort ratio is incredibly high. You get "Big Mountain" views without technical mountaineering skills. The campsites are picturesque and sheltered.
- The Bad (What Trekkers Hate): The "Traffic Jam" on the summit route. In December, hundreds of trekkers push for the summit simultaneously, creating queues at narrow sections.
The Trail: Milestones & Route Map
The Route Breakdown:
- Sankri Village: Base Camp (6,400 ft). The Highlight: A heritage village with wooden houses and grand views of the Swargarohini peaks. The staging ground for the adventure.
- Juda Ka Talab: Day 2 Camp (9,100 ft). The Highlight: The frozen lake. It’s an iconic campsite located in a clearing within the dense forest.
- Kedarkantha Base Camp: Day 3 Camp (11,250 ft). The Highlight: The open snowfield. Here the treeline ends, and you get your first daunting look at the summit peak above.
- The Summit: Day 4 (12,500 ft). The Highlight: The Shiva Shrine at the top. The panoramic view includes Bandarpoonch, Black Peak, and Swargarohini.
- Hargaon: Descent Camp (8,900 ft). The Highlight: A different return route offering new views of the Har Ki Dun valley.
How to Reach (The Gateway Hubs)
The Navigation Breakdown:
- State: Uttarakhand.
- Gateway Hub: Dehradun (Capital City).
- By Air: Fly to Jolly Grant Airport (Dehradun).
- By Train: Overnight Nanda Devi Express to Dehradun Railway Station.
- By Road: Dehradun to Sankri is a stunning but winding 10-hour drive (approx. 200 km).
The TrippinAI Verdict:
- Most Cost Efficient: Public Bus from Dehradun Railway Station to Sankri. It leaves at 5:30 AM and costs approx INR 400.
- Most Time Efficient: Private Cab directly from Dehradun Airport to Sankri. Costs INR 5,500 - 7,000.
- Most Popular: Shared Sumo/Maxi Cab arranged by trek operators. Costs INR 1,000 - 1,200 per seat.
Total Budget & Hidden Costs
The Wallet Damage:
- TrippinAI Budget Rating: Budget-Friendly to Mid-Range.
- Permits: Entry Fee Required. Govind Pashu Vihar National Park permit costs approx INR 150 (Indian) + Camping charges.
- Trek Package: Expect INR 7,000 - 12,000 per person for a 6-day all-inclusive package (Sankri to Sankri).
- Disclaimer: Prices surge during the Christmas/New Year week. Check TrippinAI for real-time pricing alerts.
Smart Spending Hacks:
- Hack #1: Avoid December 25-31. Packages cost 30-40% more during this week. Go in mid-January or February for better snow and lower prices. Save INR 3,000.
- Hack #2: Rent Gear at Sankri. Don't buy expensive snow boots. Renting boots + gaiters + spikes combo costs around INR 1,500 for the whole trek. Buying them would cost INR 8,000+. Save INR 6,500.
- "Use TrippinAI for more accurate and personalized information on costs."
Food & Local Legends
Context:
- The Flavor: Homestays in Sankri serve organic Red Rice and Rajma. It's heavy, warm, and perfect for the cold climate.
- Local Insight: The Legend of the "Throat" (Kantha). Locals believe Lord Shiva was meditating here, but was disturbed by a bull. He moved to Kedarnath, but his "throat" (Kantha) stayed here. A shrine marks the spot.
Seasonality, Safety & Health
Best Time to Visit:
- Best Window: December to February (For Snow) and March to April (For residual snow + Rhododendrons).
- Avoid: Monsoon (July-August). The trail becomes muddy and leeches are rampant.
Traveler Safety Verdict:
- For Solo Travelers: High Safety. This is one of the busiest trails in India. You will find company instantly.
- For Female Travelers: High Safety. Sankri is a safe base, and organized groups are very common.
- For Beginners: Highly Recommended. The gradient is manageable, and the altitude gain is gradual.
Risks & Actionable Mitigation:
- Slippery Ice: In winter, the trail turns into a slide. Mitigation: Micro-spikes (Crampons) are mandatory. Do not attempt the summit push without them.
- Cold Injuries: Temperatures hit -10°C at the summit. Mitigation: Wear two pairs of socks (Woolen over Cotton) to prevent frostnip in toes. Keep moving.
- "Check TrippinAI for real-time weather updates."
Getting Trek-Ready
Preparation Tips:
- Cold Conditioning: The main challenge is the cold, not the climb. Get used to cold showers to build mental resilience.
- Leg Strength: Do 50 squats daily for 2 weeks. The descent from the summit is steep and taxing on the knees.
- Hydration Discipline: You won't feel thirsty in the cold, but dehydration accelerates AMS. Force yourself to drink 3 liters daily.
Expedition Essentials
- Footwear: Waterproof High-Ankle Trekking Boots. Gaiters are essential to prevent snow from entering your boots.
- Clothing/Protection: A high-quality Down Jacket. Fleece alone will not work at the windy summit.
- The "Hero" Item: Sunglasses. The reflection of sun off the snow can cause "Snow Blindness" within hours. Never trek without them.
FAQ: Trekker's Most Asked Questions
Q: Is Kedarkantha safe in January? A: Yes, it is the most popular time. However, be prepared for temperatures dropping to -10°C or lower at night. Proper layering is critical.
Q: Is there a network on the trek? A: You get decent BSNL (and occasionally Jio/Airtel) signal at Sankri and sometimes at the Kedarkantha Base Camp. However, do not rely on it for work. Treat it as a digital detox.
Q: Can I charge my phone/camera? A: Electricity is available only in Sankri. Carry a fully charged 20,000 mAh Power Bank. Batteries drain 3x faster in the cold, so keep them warm inside your jacket/sleeping bag at night.
Planning Kedarkantha? Snow storms can block the Sankri road overnight. Static blogs can't re-route your transport. TrippinAI gives you real-time updates and personalized itineraries. [Plan your winter trek now.]
Recommended for You
Namdapha Rainforest Trek Guide: The "Amazon of India" & The Four Cat Realm
Japfu Peak Trek Guide: The "Rhododendron Giant" & Valley Watchtower